How to Install Gramps Web API on a Synology NAS
Updated article: How to Install Gramps Web on a Synology NAS
Today we are going to look at how you can install Gramps Web API on a Synology NAS using Portainer, as we cannot use the native Docker application in Synology.
Please follow the portainer link above to learn how to install it from Wundertech
Gramps Web API project provides a RESTful web API to query a Gramps family tree database. It can serve e.g. as backend for a web app. It is actively developed and eventually the API would allow you to add and edit Gramps data as well.
Instructions
- Inside the Docker shared folder, create a sub-folder named ‘gramps’, then create three sub-folders inside of that folder: config, gramps_media, grampsdb.

2. Within the config folder upload a config file named ‘config.cfg’.
All the details about the configuration file can be found here
Example contents of the file are given below:
TREE="Example"  # set the name of your family tree
SECRET_KEY="..." # set your secret key
# do not change the following lines as they refer to paths within the container
USER_DB_URI="sqlite:////app/users/users.sqlite"
MEDIA_BASE_DIR="/app/media"
SEARCH_INDEX_DIR="/app/indexdir"
STATIC_PATH="/app/static"
3. Copy your Gramps Database, with the latest version of Gramps (5.14 at the time of writing) it will be a folder and you can see the path of the folder within the Gramps UI while loading the tree.

4. Upload this copied DB folder to your Synology NAS, into the grampsdb folder created in Step 1

5. Double click on the folder uploaded to check the contents and make sure everything is in there.

7. Ensure that Portainer is installed on your Synology and launch Portainer.
8. Select Stacks and then Add Stack.

9. Give the container a name and then paste the stack below. Be sure to update the items in bold to reflect the local path to your config folder and media folders. If the folder structure was followed in steps 1, these are the default values.
version: "3.7"

services:
  gramps_webapi:
    image: dmstraub/gramps-webapi:latest
    restart: always
    ports:
      - "80:5000"
    volumes:
      - gramps_users:/app/users
      - gramps_index:/app/indexdir
      - gramps_thumb_cache:/app/thumbnail_cache
      - /volume1/docker/gramps/config/config.cfg:/app/config/config.cfg
      - /volume1/docker/gramps/grampsdb:/root/.gramps/grampsdb
      - /volume1/docker/gramps/gramps_media:/app/media

volumes:
  gramps_users:
  gramps_index:
  gramps_thumb_cache: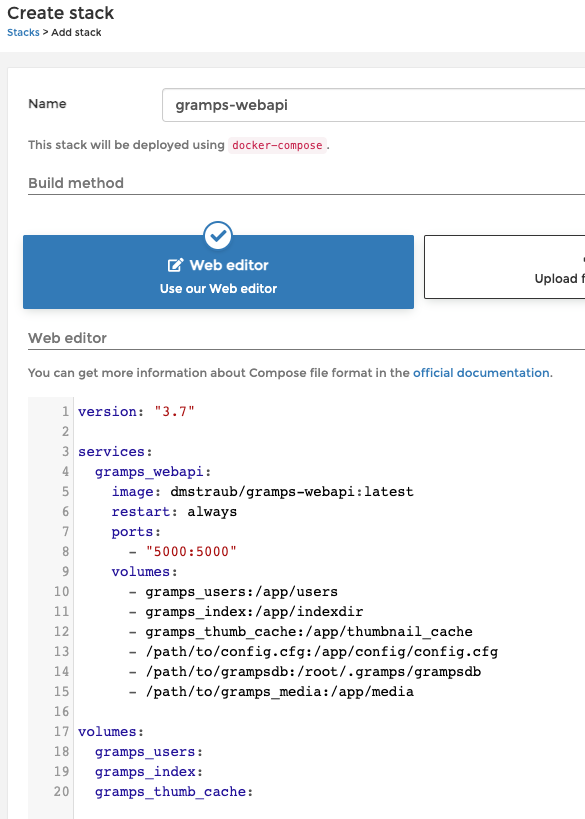
10. Select Deploy the stack when you’re finished.
11. Once the deployment is complete, click on Containers on the left to see, the webapi running.
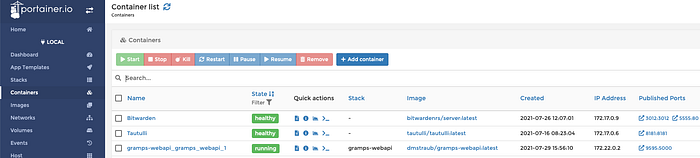
13. The container will be created. When it’s finished, you can access it by navigating to the IP address of your Synology NAS and port 5000.
http://[SYNOLOGY_NAS_IP]:5000/api/metadata/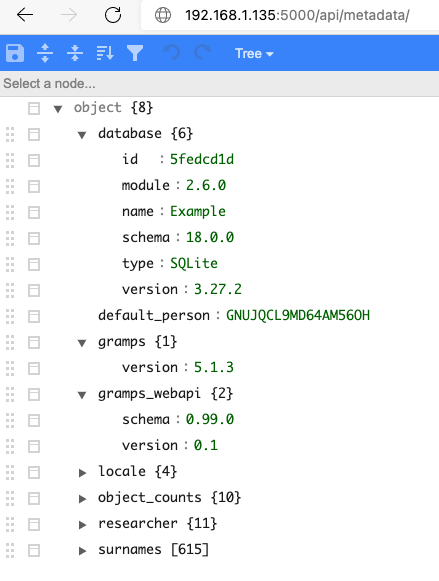
Note 1: You need to further add users to access and use the front end system, which can be done by executing the following docker command:
docker-compose run gramps_webapi \
   python3 -m gramps_webapi \
   --config /app/config/config.cfg user add \
   --fullname ‘My full name’ \
   --email ‘my@email’ \
   —-role 4 \
   my_username my_password
Note 2: You need to build search index, which can be done by executing the following docker command:
docker-compose run gramps_webapi \
   python3 -m gramps_webapi \
   --config /app/config/config.cfg \
   search index-full
Note: From the time of writing this, the wonderful people maintaining the web-api have new documentations. Deployment — Gramps Web API (gramps-project.github.io)
